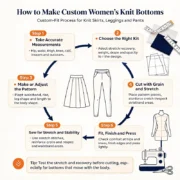
How to Make Custom Women’s Knit Bottoms

Custom women’s knit bottoms let fashion brands, wholesalers, retailers, and private-label businesses develop products around their own designs, target customers, and price points. Popular options include knitted trousers, wide-leg pants, ribbed leggings, knit shorts, pencil skirts, maxi skirts, and matching knit sets.

However, producing custom knit bottoms involves more than choosing a color and sending a picture to a factory. Yarn composition, knitting structure, garment measurements, stretch recovery, waistband construction, and finishing all influence the final product.

As a garment manufacturer in Qingdao, China, we recommend that B2B buyers approach product development step by step. This guide explains how to turn an idea into a production-ready style, what information to prepare before requesting a quotation, and which quality checkpoints matter before placing a bulk order.
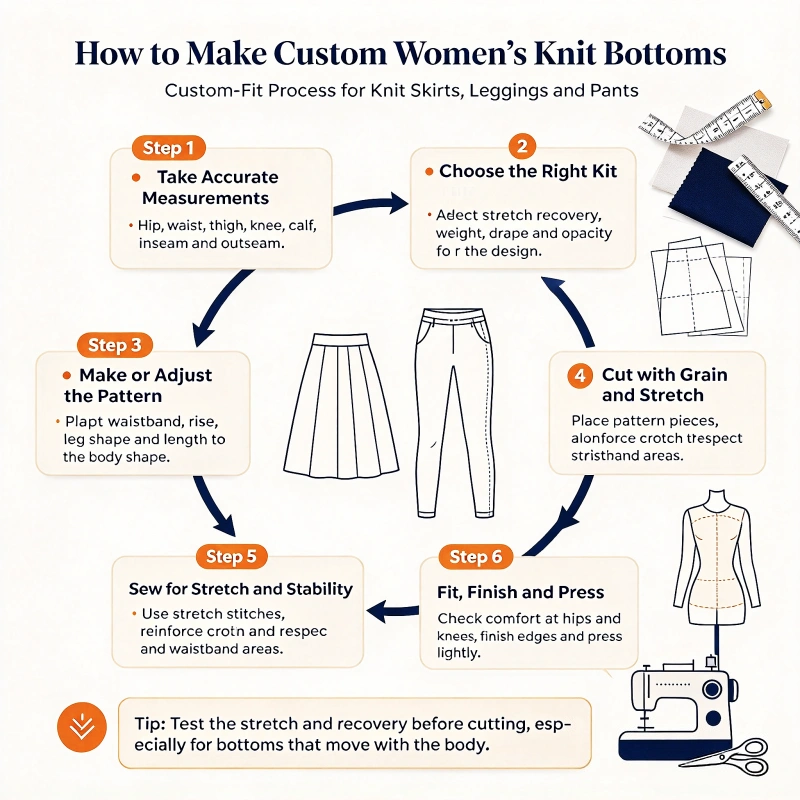
1. Understand What B2B Buyers Want from Custom Women’s Knit Bottoms

Before contacting a manufacturer, define the product category, target customer, and commercial purpose. These decisions determine the materials, construction, pricing strategy, and sampling requirements.

Different buyers may use the term “women’s knit bottoms” to describe very different products.

Product typeTypical design featuresPotential target market
Knitted wide-leg pantsRelaxed fit, straight or wide legs, soft drapeFashion brands and lifestyle retailers
Ribbed knit leggingsStretch fit, elastic waistband, close-fitting silhouetteContemporary apparel and comfortwear brands
Knitted trousersStructured waistband, tailored or straight-leg designPremium fashion and office-casual retailers
Knit shortsPull-on waistband, short or mid-thigh lengthSummer collections and loungewear brands
Knitted pencil skirtsSlim silhouette, ribbed or fine-gauge constructionBoutique and coordinated fashion collections
Knit maxi skirtsLong silhouette, elastic waist or fitted waistbandSeasonal fashion and resortwear brands
Matching knit setsCoordinated tops and bottoms with matching yarn and colorPrivate-label brands and fashion retailers

What information should buyers confirm first?

Before development begins, we suggest defining these five elements:

  1. Target market: Identify your intended customer, sales channel, and target retail price.
  2. Product category: Decide whether you need leggings, trousers, shorts, skirts, or matching sets.
  3. Fit direction: Specify slim, regular, relaxed, straight-leg, wide-leg, or oversized styling.
  4. Season and use: Clarify whether the product is designed for summer, winter, everyday wear, travel, or lounging.
  5. Order plan: Estimate the number of styles, sizes, colors, and pieces required for the first order.

For example, a brand developing a premium winter knit set may prioritize warmth, a soft hand feel, and a coordinated appearance. A retailer sourcing lightweight summer knit pants may emphasize breathability, drape, opacity, and easy-care performance.

Defining these requirements early helps the manufacturer recommend a practical construction instead of developing a sample based on assumptions.

2. Prepare a Tech Pack for Custom Women’s Knit Bottoms

A tech pack translates your design concept into specifications that a manufacturer can follow during sampling and bulk production. If you do not have a complete tech pack, you can start with a sketch, reference photographs, a physical garment, or a product description. Then confirm the missing technical details with your supplier.

A useful tech pack should include the following information.

Technical detailWhat to provideWhy it matters
DesignFront and back sketches, reference images, style numberEstablishes the intended appearance
MaterialFiber composition, yarn type, fabric weight where applicableControls hand feel, drape, warmth, and cost
Knit structureRib, jersey, cable, jacquard, pointelle, or other structureDetermines surface texture and stretch behavior
MeasurementsWaist, hip, rise, inseam, outseam, thigh, leg opening, skirt lengthControls fit and sizing
ConstructionWaistband, pockets, cuffs, slits, seams, closuresDefines functional and visual details
ColorPantone reference or approved physical swatchReduces color-matching uncertainty
BrandingMain label, care label, logo, hangtagSupports private-label presentation
PackagingFolding method, polybag, size sticker, carton requirementsAligns production with your sales channel

For knit bottoms, a general clothing specification is not always enough. The manufacturer also needs to understand the yarn, knitting structure, gauge where applicable, and finishing method. These factors can change the garment’s dimensions and appearance. See this knitwear tech-pack guide for further technical background.

Our practical recommendation: If you are developing a product from a reference garment, send clear photographs and a measurement sheet together. Highlight the features you want to retain and the features you want to change. This makes the first development round more focused.
3. Choose the Right Yarn and Knitting Structure

Material selection is one of the most important decisions in manufacturing custom knit bottoms. Two products with similar designs can perform differently because of their fiber composition, yarn construction, knitting structure, and finishing.

Common yarn options

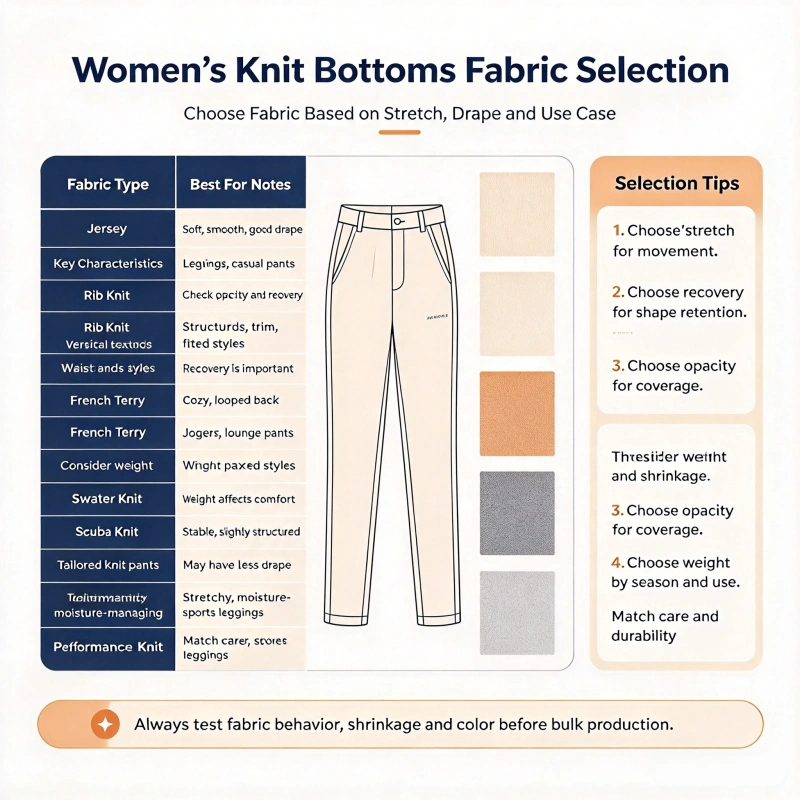
Yarn or fiber optionMain characteristicsSuitable applications
CottonSoft hand feel and familiar everyday comfortCasual pants, shorts, skirts, loungewear
Viscose or rayonSmooth touch and fluid drapeWide-leg pants, lightweight skirts
PolyesterUseful for durability and color consistency, depending on constructionFashion bottoms and selected performance-oriented styles
AcrylicCan provide a wool-like appearance at a different price pointFashion knit pants and seasonal collections
Wool or merino woolWarmth and a natural fiber feelCold-weather trousers, skirts, and premium knitwear
Blended yarnsCan balance selected properties of different fibersVersatile commercial collections

These are general material characteristics, not guarantees for every yarn. Fiber quality, yarn count, blending ratio, stitch structure, and finishing all affect the final result.

For instance, a viscose-rich yarn may create the drape desired for wide-leg trousers, but the manufacturer still needs to evaluate the finished garment’s dimensional stability. A cotton blend may suit casual knit pants, but the exact construction must provide the required stretch and recovery.

Select a knit structure that matches the design

The main structures used in knitwear include:

  • Rib knit: Often selected for fitted silhouettes, textured panels, waistbands, and cuffs.
  • Jersey knit: Suitable for many lightweight, smooth-surface designs, depending on the yarn and construction.
  • Cable knit: Creates a raised, decorative appearance for more textured seasonal products.
  • Jacquard knit: Allows patterns and multiple colors to be incorporated into the knitted structure.
  • Pointelle knit: Creates decorative openwork that works well for lightweight fashion styles.
  • Waffle or textured knit: Adds surface dimension and a more structured visual effect.

The best option depends on the product’s intended fit, opacity, stretch, weight, and price positioning.

What do buyers need to know about knitting gauge?

For machine-made knitwear, gauge is a technical parameter that affects stitch density and the fabric’s appearance. Some flat-bed knitwear programs use gauges such as 3GG–5GG for chunkier constructions, 7GG–9GG for many medium-weight designs, and 12GG–14GG for finer constructions. These are indicative examples, not universal rules; the right gauge depends on the machine, yarn, structure, and product specification.

Don’t treat gauge as a substitute for fabric weight or fiber composition. Two products made at the same gauge may have different weights, drape, and stretch characteristics.

For more technical context, review this overview of knitwear manufacturing.
4. Decide How the Knit Bottoms Will Be Constructed

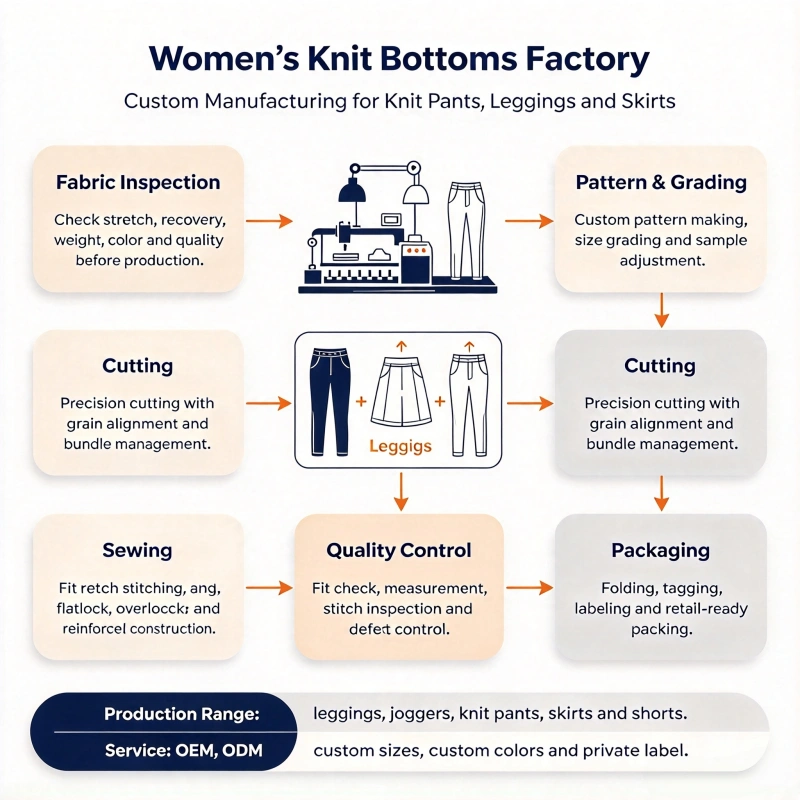
Not every knitted garment is made in the same way. The appropriate production method depends on the design, material, machine capabilities, and required finish.

Option A: Fully fashioned knit construction

In fully fashioned knitwear, garment panels or shaped sections are knitted to the required form and then joined. This approach suits structured fashion knitwear and selected knitted trousers or skirts.

Potential advantages include shaped knitted components and reduced reliance on cutting the garment from a large piece of knitted fabric. However, you must evaluate machine programming, yarn choice, panel shaping, and linking requirements for each style.

Option B: Cut-and-sew knitted fabric

In this method, the clothing manufacturer first produces knitted fabric, then cuts it to pattern and sews it into the finished garment. It may suit certain leggings, knit shorts, casual trousers, and other knitted styles.

The manufacturer needs to evaluate fabric relaxation, stretch direction, pattern layout, seam construction, and cutting stability. If the material stretches or relaxes significantly, cutting before the fabric has been properly prepared may lead to inconsistent garment dimensions.

Neither method is automatically better for every design. Buyers should ask the manufacturer to recommend the construction that best fits their product requirements and target price.

5. Develop the Pattern and Confirm Measurements

Fit is a major factor in whether custom women’s knit bottoms meet a brand’s expectations. A pair of trousers may look correct in a sketch but fit poorly if the rise, hip ease, leg shape, or waistband is not developed correctly.

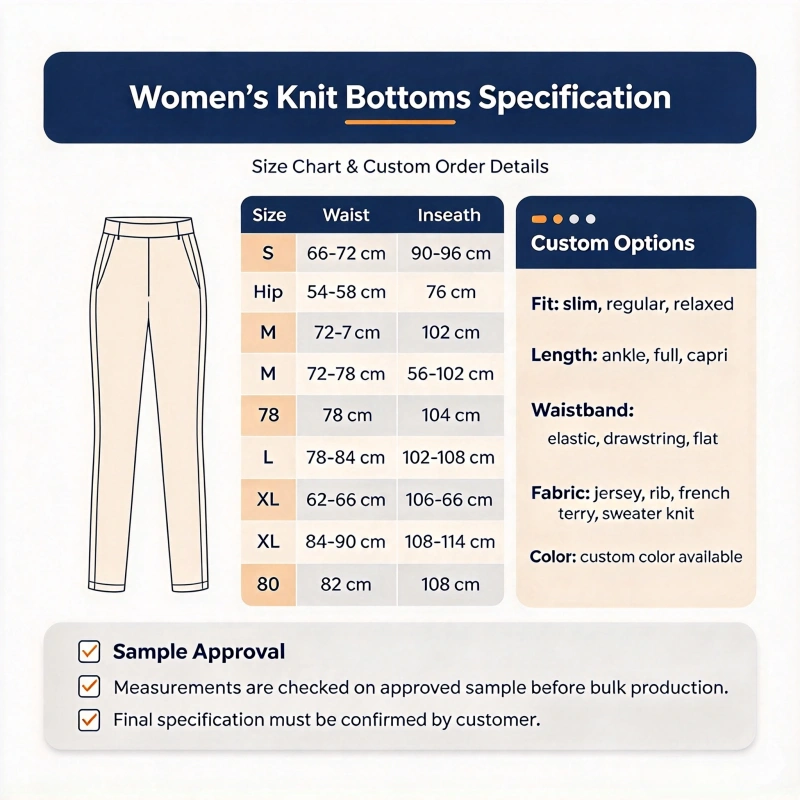
Start by identifying the base size, then prepare a graded size chart for the complete size range.

For example, a brand offering XS, S, M, L, XL, and XXL needs specifications for 6 sizes. Set grading increments based on intended fit, customer measurements, and product category, not a single increment for all measurements.

Key measurement points

MeasurementWhat it controls
Waist circumferenceWaist fit and comfort
Hip circumferenceRoom through the seat and hips
Front riseFront waist-to-crotch proportion
Back riseRear coverage and seat comfort
Thigh circumferenceUpper-leg ease
InseamInside-leg length
OutseamOverall trouser length
Leg openingStraight, tapered, or wide-leg silhouette
Skirt lengthOverall skirt proportion
Waistband heightAppearance and support at the waist

For a fitted product, such as ribbed leggings, stretch and recovery are particularly important. For wide-leg knit pants, drape and the balance between hip ease and leg width may have a greater influence on the final silhouette.

How should buyers evaluate the fit sample?

While reviewing a sample, verify additional criteria beyond whether the garment is wearable. Compare the actual measurements against the specification and examine how the product behaves when standing, sitting, walking, and bending.

Pay particular attention to:

  • Whether the waistband rolls, twists, or slips.
  • Whether the fabric becomes excessively transparent when stretched.
  • Whether the rise provides sufficient coverage and comfort.
  • Whether the legs hang evenly and maintain the intended silhouette.
  • Whether the garment length remains suitable after washing.
  • Whether the fabric returns to its intended shape after stretching.

Experience-based advice: For stretch knit bottoms, evaluate the waistband and hip area together. A waistband that appears correct when measured flat may still feel uncomfortable or move out of position when the wearer sits or walks.

6. Make Samples Before Confirming Bulk Production

Sampling gives both the buyer and manufacturer an opportunity to identify technical issues before committing to a production order.

For a new custom knit bottoms project, we recommend the following development sequence.

Step 1: Review the design brief. Confirm the target product, size range, yarn direction, knit structure, colors, and construction details.

Step 2: Confirm materials and swatches. Review yarn samples or knitted swatches to assess color, texture, thickness, and hand feel.

Step 3: Develop the first garment sample. Produce a physical sample using the proposed construction and measurements.

Step 4: Review the fit. Check waist, hip, rise, length, leg shape, and other product-specific measurements.

Step 5: Revise and approve. Clearly record changes and confirm the final sample and specifications before bulk production.

A simple design may require fewer revisions than a style involving complex jacquard patterns, unusual shaping, or coordinated knit structures. No single sampling schedule applies to every project, so buyers should confirm the development timeline with the factory.

During sample review, use a written comment sheet rather than relying only on verbal feedback. For example, record the exact measurement that needs to change, the required new value, and whether the change applies to one size or the complete size range.

This creates a clear record for the next sample and reduces the risk of repeating the same correction.
7. Calculate the Cost of Custom Women’s Knit Bottoms

The cost of custom knit bottoms depends on more than the garment’s finished weight. Material selection, knitting method, design complexity, order quantity, finishing, branding, and packaging all influence the quotation.

A manufacturer typically needs enough technical information to assess the project before providing a meaningful unit price.

Cost factors affect the quotation. Yarn composition drives material costs. Different fibers, yarn qualities, and blends vary in cost. Knit structure influences programming or production work. Complex textures or patterns may require extra steps. Construction method matters: fully fashioned and cut-and-sew styles need different production resources. Garment dimensions require more material or machine time. Design details add operations, such as pockets, waistbands, and trims. Order quantity changes how setup and development costs are allocated across sizes. Color options affect yarn sourcing, dyeing, and planning. Branding and packaging add costs like labels, hangtags, folding, and retail packaging.

There is no reliable universal price for custom women’s knit bottoms without knowing the specifications. Buyers should not expect a basic knit short and a complex jacquard wide-leg trouser to have the same unit cost.

How can B2B buyers control costs?

  1. Standardize materials where possible. Using the same approved yarn across coordinated styles may simplify sourcing.
  2. Limit unnecessary design variations. Multiple structures, trims, or color combinations can add complexity.
  3. Confirm the size range early. Size distribution affects production planning and material estimates.
  4. Ask for quantity-based quotations. Compare the unit cost at your realistic order quantities rather than relying on one volume.
  5. Clarify what the price includes. Confirm sampling charges, labels, packaging, inspection, shipping terms, and any other applicable costs.

When comparing suppliers, make sure the quotations describe the same product. A lower price is not necessarily a better deal if the yarn, measurements, finishing, or packaging specifications differ.

8. Confirm MOQ, Lead Time, and Production Capacity

Before placing a purchase order, confirm the manufacturer’s minimum order quantity (MOQ), sampling schedule, bulk production lead time, and capacity for repeat orders.

These details vary by supplier and project. Fully fashioned knitwear, complex patterns, custom yarn colors, and multiple size or color combinations can require different planning from simpler knitted garments.

As a buyer, ask the factory to clarify:

  • Is the MOQ calculated per style, per color, or per order?
  • Can multiple sizes be included within one colorway?
  • Are custom yarn colors subject to a separate minimum?
  • How long will sample development take?
  • When does the bulk production lead time begin?
  • Can the manufacturer support repeat orders using the approved specifications?

At Qingdao Chengyuan Garment Co., Ltd., we provide integrated garment services covering design, pattern making, sampling, and bulk production. We maintain a monthly capacity of 80,000–120,000 finished garments across our operations. We support small trial orders and larger B2B production programs, with project requirements reviewed before confirming feasibility.

This capacity figure refers to our overall garment operations, not a guaranteed monthly output for women’s knit bottoms alone. Actual production availability depends on the style, construction, order quantity, and production schedule.

9. Establish Quality Control Standards Before Bulk Production

Start quality control before bulk manufacturing, not only when the finished garments are packed.

For knit bottoms, the most useful approach is to agree on measurable acceptance criteria with the manufacturer before production starts.

Recommended quality checkpoints

Incoming materials

  • Confirm the agreed fiber composition and yarn or fabric specification.
  • Check color consistency against the approved reference.
  • Evaluate visible material defects.
  • Test dimensional stability where relevant to the material and product.

During production

  • Check knitting or fabric defects.
  • Inspect seams, linking, waistband attachment, and other construction details.
  • Compare garment measurements with the approved specification.
  • Monitor color consistency and the knit structure’s appearance.

After finishing

  • Measure garments using the agreed measurement method.
  • Check appearance after any required washing or finishing.
  • Inspect the waistband, hems, seams, pockets, and decorative details.
  • Confirm labels, size identification, folding, and packaging.

Test shrinkage and shape retention

Knitwear can change dimensions after washing, drying, steaming, or other finishing processes. The extent of change depends on fiber composition, yarn, construction, and care conditions.

Before bulk production, agree on the applicable care method and dimensional stability requirements. Test a representative sample using the intended care process, then compare the measurements before and after treatment.

For example, if a pair of knit trousers is approved at a specified inseam length, the buyer and factory should establish the acceptable measurement range after the agreed finishing process. Do not assume that all knit fabrics will behave the same way.

Use a documented inspection standard

For bulk orders, establish acceptable measurement tolerances, defect classifications, and final inspection requirements in writing. Some buyers use an AQL-based sampling plan, but the inspection level and acceptance criteria should be agreed upon for the specific product and order.

A written standard makes it easier for the buyer, factory, and third-party inspector to evaluate the same batch consistently.

10. Customize Branding and Packaging for Your Market

For private-label buyers, confirm branding details before bulk production. These elements affect the garment’s presentation and may require additional materials or production steps.

Common options include:

  • Woven brand labels.
  • Printed care and composition labels.
  • Hangtags with product information.
  • Branded size labels or size stickers.
  • Individual polybags or other agreed packaging.
  • Custom folding and carton marking.

For coordinated knit sets, confirm whether the top and bottom should use matching yarn, color, branding, and packaging. If both pieces are sold together, their color and texture consistency can influence how the complete set is perceived.

Buyers should also ensure that fiber-content labels, care instructions, country-of-origin information, and other required labeling comply with the rules applicable to their destination market. The exact requirements depend on where the products will be sold.

11. Common Mistakes to Avoid When Sourcing Custom Knit Bottoms

Even a clear design concept can run into production problems if you leave key decisions open.

Mistake 1: Sending only a reference image.

A picture communicates appearance, but it may not specify yarn, measurements, construction, or finishing. Provide a tech pack or work with the manufacturer to document these details before sampling.

Mistake 2: Choosing yarn based only on price.

A low-cost yarn may not provide the required drape, softness, stretch recovery, or appearance. Compare material options against the intended product performance.

Mistake 3: Approving the sample without checking measurements.

A sample may look attractive but still fail to meet the brand’s fit requirements. Record measurements and review the garment on an appropriate fit model or through a documented fitting process.

Mistake 4: Ignoring post-wash performance.

The product should be evaluated under its intended care conditions. Otherwise, shrinkage or shape changes may become visible only after customers begin using the garment.

Mistake 5: Changing specifications after bulk production starts.

Changes to yarn, color, dimensions, or construction can affect cost and delivery schedules. Approve the key specifications before authorizing production.

Mistake 6: Comparing quotations without comparing specifications.

Confirm that suppliers are quoting the same composition, construction, measurements, quantity, labels, and packaging. This provides a more meaningful basis for comparison.

12. How to Start a Custom Women’s Knit Bottoms Project with Our Factory

At Qingdao Chengyuan Garment Co., Ltd., we work with B2B customers developing apparel collections for wholesale, retail, and private-label markets. Our integrated services cover design, pattern making, sample development, and bulk garment production.

To help us evaluate a custom women’s knit bottoms project, buyers can prepare the following information:

  1. Product type: knitted trousers, leggings, shorts, skirts, or matching sets.
  2. Reference images, sketches, a tech pack, or an existing sample.
  3. Target yarn or material composition, if already decided.
  4. Required colors and size range.
  5. Estimated quantity by style and color.
  6. Branding, labeling, and packaging requirements.
  7. Target delivery date and destination market.

If you have not finalized the material or construction, you can still start with a reference design and your target retail positioning. We can review the requirements and identify which details need confirmation before sampling and quotation.

The goal is to establish a clear production specification, approve a sample that meets your expectations, and use that approved standard to guide bulk manufacturing.
Frequently Asked Questions

1. What types of custom women’s knit bottoms can a garment manufacturer develop?

Depending on the manufacturer’s equipment and production capabilities, options may include knitted trousers, wide-leg pants, ribbed leggings, shorts, pencil skirts, maxi skirts, and coordinated knit sets. Confirm the construction and material requirements for your specific design before starting development.

2. Can I develop custom knit bottoms from a picture instead of a tech pack?

Yes. You can use a reference picture to start the discussion. However, the manufacturer will still need to confirm measurements, yarn, knit structure, construction, color, and finishing details before producing a reliable sample.

3. What information is needed for a quotation?

The most useful information includes product type, reference design, material requirements, measurements, size range, colors, order quantity, branding, and packaging. The more details you provide, the easier it is for the manufacturer to evaluate the project accurately.

4. What is the MOQ for custom women’s knit bottoms?

MOQ varies by manufacturer, construction method, yarn availability, color requirements, and order complexity. Ask whether the minimum applies per style, colorway, or total order, and confirm the minimum before approving development.

5. How long does it take to make custom knit bottoms?

The timeline depends on material availability, design complexity, sample revisions, order quantity, and production scheduling. Request separate estimates for sampling and bulk production, and clarify when the bulk lead time officially starts.

6. How can I reduce the risk of inconsistent sizing?

Provide a complete measurement chart, define tolerances, approve the fit sample, and confirm how garments will be measured after finishing. For a multi-size collection, request a graded size specification rather than relying on one sample size alone.

7. Can I customize the waistband, pockets, and leg shape?

These details can often be customized, subject to the selected construction and factory capabilities. Confirm the waistband height and finish, pocket dimensions and position, rise, leg opening, and overall silhouette during product development.

8. Can the factory produce matching knit tops and bottoms?

Coordinated sets may be developed when the manufacturer can support both products. Confirm the yarn, color reference, knit structure, and finishing requirements for each piece so the finished set has a consistent appearance.

9. How should I check the quality before shipment?

Agree on the approved sample, measurement tolerances, material requirements, appearance criteria, defect classifications, and inspection method before bulk production. Depending on the order, inspection can include measurements, construction, color, finishing, labeling, and packaging.

10. What is the best way to start working with a Chinese garment manufacturer?

Prepare a clear product brief, send reference materials, explain your target market and order plan, and ask the manufacturer to confirm feasibility before sampling. Review the sample carefully and document every approved specification before authorizing bulk production.

Conclusion

Making custom women’s knit bottoms is a coordinated process involving product planning, yarn and structure selection, pattern development, sampling, cost evaluation, bulk production, and quality inspection.

For B2B buyers, the most effective starting point is a clear product brief and a realistic understanding of the intended fit, material, and target price. Confirming these details before sampling helps manufacturers provide more useful recommendations and reduces avoidable changes later in the production process.

If you are planning a new women’s knit bottoms collection, prepare your design references, size range, target quantity, and customization requirements before requesting a quotation. A well-defined specification is the foundation for consistent quality and a more predictable manufacturing process.

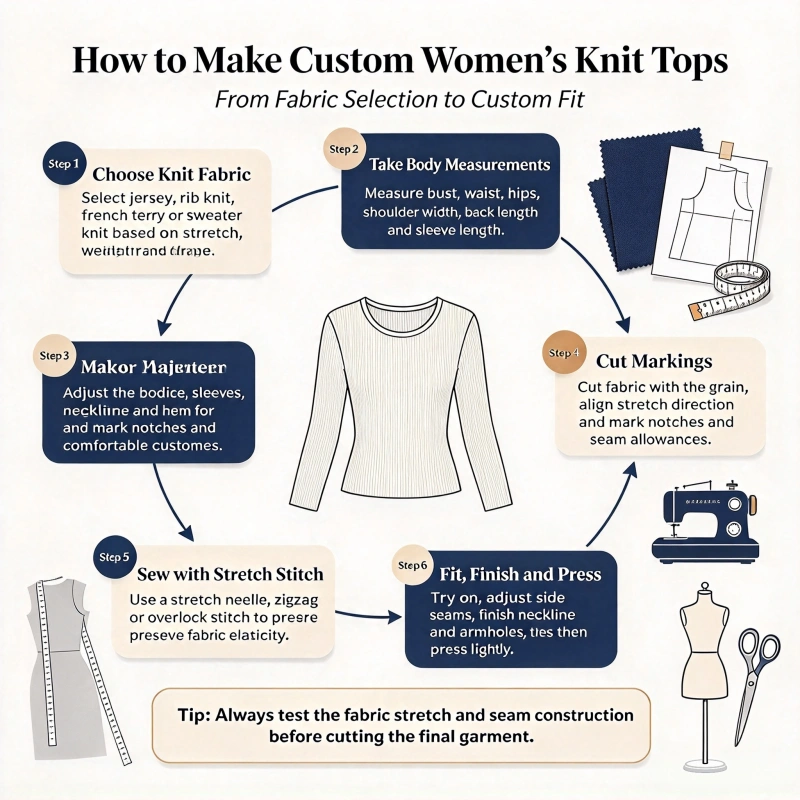
How to Make Custom Women’s Knit Tops: A Step-by-Step

If you are planning to launch a women’s knitwear collection, you may already have a design in mind. Perhaps you want a fitted ribbed top, a lightweight knitted polo, a cropped sweater, or a basic knit top with your own label. The next question is how to turn that idea into a product that a manufacturer can actually produce.

Making custom women’s knit tops involves more than choosing a fabric and sending a picture to a factory. You need to confirm the yarn, knit structure, measurements, colors, construction, branding, target cost and production requirements before moving into bulk manufacturing.

At Qingdao Chengyuan Garment Co., Ltd., we provide integrated garment development services covering design, pattern making, sample development and bulk production. Our monthly production capacity is approximately 80,000–120,000 finished garments, and we support both small trial orders and larger production programs.

In this guide, we explain the custom women’s knit top manufacturing process from a buyer’s perspective, including the decisions that affect product quality, cost and delivery.

1. Define Your Product and Target Market

Before contacting a manufacturer, decide exactly what kind of women’s knit top you want to develop.

Women’s knit tops cover a broad range of products, including:

  • Basic crew-neck and V-neck knit tops
  • Ribbed fitted tops
  • Sleeveless knitted tops and tank tops
  • Short-sleeve and long-sleeve knit tops
  • Knitted polo shirts
  • Cropped knit tops
  • Lightweight layering tops
  • Fashion knit tops with jacquard, open-knit or textured details

Your target customer determines many of the decisions that follow.

For example, a brand selling affordable everyday basics may prioritize easy-care yarns, repeatable colors and cost efficiency. A premium boutique label may focus more on yarn softness, refined stitch structures, finishing and distinctive details.

Before requesting a quotation, prepare these five basic details:

InformationWhat to Decide
Product typeTank top, ribbed top, polo, cropped top or another style
Target marketEveryday basics, premium fashion, resort wear or another segment
Order quantityEstimated total units and quantity per color
Target priceYour intended factory cost per piece
Launch dateWhen the products must be ready for shipment or sale

You do not need to have every technical detail finalized at this stage. However, a clear product direction helps the manufacturer recommend suitable materials and construction methods.

2. Prepare a Tech Pack or Reference Sample

A tech pack is one of the most useful documents in custom clothing production. It communicates your requirements in a format that the factory can follow.

A knit top tech pack should ideally include:

  • Front and back technical drawings
  • Yarn or material requirements
  • Knit structure and stitch details
  • Garment measurements and size chart
  • Color references
  • Neckline, sleeve and hem construction
  • Labels, logos and trims
  • Washing and care requirements
  • Packaging instructions
  • Target quantity and delivery schedule

If you do not have a complete tech pack, you can start with a sketch, photographs, a reference garment or a sample purchased from the market.

However, be specific about what you want to reproduce. For example, if you send a photograph of a ribbed knit top, explain whether you want to copy its silhouette, rib pattern, neckline, fabric thickness or all four.

A photograph shows the appearance, but it rarely communicates every production detail. Clear notes and measurements help reduce misunderstandings during sampling.

3. Select the Yarn and Knit Structure

This is one of the most important steps because yarn and knit structure influence the garment’s appearance, weight, stretch, drape, comfort and cost.

Choose the right yarn

Common options for women’s knit tops include:

Yarn or Fiber OptionTypical CharacteristicsCommon Applications
CottonBreathable, familiar hand feel and suitable for many casual stylesEveryday tops and summer knitwear
ViscoseSmooth drape and a soft feelFashion tops and lightweight layering pieces
PolyesterUseful for durable, easy-care blendsCasual and commercial knitwear
AcrylicCan provide a wool-like appearance at a different price pointFashion knit tops and sweaters
Merino woolFine wool fiber with natural temperature-regulating propertiesPremium seasonal knitwear
Blended yarnsCombine selected fiber characteristicsProducts balancing cost, comfort and performance

These are general characteristics, not guarantees. The final result depends on yarn quality, construction, finishing and the specific blend.

Choose the knit structure

Your manufacturer should also help determine the appropriate knit structure.

  • Plain knit: A versatile option for simple, clean designs.
  • Rib knit: Offers stretch and is often used for fitted silhouettes.
  • Pointelle: Creates a delicate openwork appearance.
  • Jacquard: Supports more complex patterns and color combinations.
  • Textured knit: Adds surface interest without relying only on printed graphics.

Gauge matters, too. As an illustrative industry reference, knitwear may use approximately 3–5 gauge for chunkier structures, 7–9 gauge for some medium-weight structures, and 12–14 gauge for finer structures. These are not fixed rules for every knit top. The suitable gauge depends on the yarn, machine, design and desired fabric properties. Kiwi Giyim’s knitwear tech pack guide provides further technical background.

Practical tip: Do not select gauge independently of yarn and stitch structure. Ask the manufacturer to assess these elements together before approving the sample.

4. Confirm Measurements, Fit and Size Grading

A knit top can look attractive on a model but still perform poorly in retail if the fit is inconsistent.

For women’s knit tops, key measurements commonly include:

  • Chest width
  • Shoulder width
  • Body length
  • Sleeve length
  • Armhole depth
  • Neck opening
  • Hem width

Start by choosing a base size, such as size S or M, and create a measurement chart for the full size range.

For example, if your planned collection covers XS–XXL, that means six size labels. Define the measurement increments between sizes based on your target customer’s proportions and the intended fit, rather than using arbitrary increases.

Also clarify whether measurements are taken with the garment lying flat, in a relaxed state, or under a specified amount of stretch.

This matters because knitted materials can change shape after washing, drying or steaming.

A fitted ribbed top, for instance, may require different stretch and recovery expectations from a loose, straight-cut knit top. Approving the size chart without checking the physical sample can lead to costly adjustments later.

5. Develop and Review the First Sample

Once the technical details are sufficiently clear, the manufacturer can develop a sample for evaluation.

The sample process commonly involves:

  1. Reviewing the design and technical requirements.
  2. Confirming yarn availability and construction feasibility.
  3. Developing the first sample.
  4. Measuring the garment and checking its appearance.
  5. Recording your comments and making necessary revisions.
  6. Producing a final sample for approval.

The first sample does not always need to be perfect. Its purpose is to reveal problems while changes are still manageable.

When reviewing your women’s knit top sample, check the following:

CheckpointWhat to Look For
FitDoes the top match your intended silhouette?
Hand feelIs the material soft, firm, lightweight or structured as required?
StitchingAre seams and joining areas neat and secure?
NecklineDoes it sit correctly without unwanted stretching or gaping?
Rib recoveryDoes the ribbed area return appropriately after stretching?
ColorDoes the sample match the approved color reference?
MeasurementsAre the key points within your specified tolerances?
FinishingAre there loose threads, holes, stains or visible defects?

A useful rule is to record comments in a numbered list and attach photographs showing the exact problem areas.

Instead of writing, “The neckline looks wrong,” write something like, “Reduce the neckline opening by 1 cm on the approved base size and resubmit for review.” The exact adjustment will depend on your design, but specific instructions are much easier for a factory to implement.

6. Test Washing and Approve the Pre-Production Sample

This step is easy to overlook, especially when the first sample looks good straight out of the package.

Knitwear can change after washing or finishing. Depending on the fiber and construction, you may see shrinkage, stretching, twisting, pilling or changes in hand feel.

Before bulk production, agree on the care method and the relevant performance checks for your product.

For example, you can compare the garment’s measurements before and after a defined washing procedure. If the top is intended for machine washing, test it under conditions that reflect the intended care instructions.

There is no single shrinkage percentage that applies to every women’s knit top. The acceptable result should be agreed upon according to the fabric, garment design and buyer’s quality requirements.

Once the pre-production sample is approved, retain a physical reference sample and the corresponding measurement specifications. This gives both the buyer and manufacturer a clear standard for bulk production.

Do not approve a sample based only on appearance if fit, washing performance or fabric feel is important to your product.

7. Confirm Pricing, MOQ and Production Schedule

After the design and sample requirements become clear, request a detailed quotation.

The price of a custom women’s knit top depends on several factors:

  • Yarn composition and yarn consumption
  • Knit structure and construction complexity
  • Garment weight and dimensions
  • Number of colors and custom-dye requirements
  • Labels, trims and decorative details
  • Order quantity per style and color
  • Testing, finishing and packaging requirements

For an accurate comparison, ask manufacturers to quote against the same specifications.

For example, don’t compare a basic cotton knit top and a fine-gauge merino top on unit price alone. Their material costs, production requirements and intended retail positioning may differ considerably.

Also confirm the minimum order quantity (MOQ) per style and color, sample charges, payment terms, production lead time, shipping terms, and any extra development costs.

There is no universal MOQ or production timeline for custom knit tops. These depend on the factory, yarn availability, construction and order details. Ask the manufacturer to confirm the terms for your specific project instead of relying on an industry-wide estimate.

At Qingdao Chengyuan Garment, As a professional manufacturer of women’s knit tops, we support small trial orders as well as larger B2B production programs. Confirm available quantity and schedule based on each order’s requirements.

8. Move Into Bulk Production and Quality Control

Begin bulk production only after the essential details are confirmed.

Before production, make sure the buyer and manufacturer have approved:

  • Final sample and measurement chart
  • Yarn composition and color standard
  • Knit structure and construction
  • Labels, logos and trims
  • Washing and finishing requirements
  • Size and color breakdown
  • Packaging and carton specifications
  • Delivery schedule and inspection requirements

Quality control should occur throughout production, not only at the end.

For women’s knit tops, important checks include yarn and color consistency, stitch quality, garment measurements, neckline and hem construction, loose threads, stains, holes and overall appearance.

A practical approach is to check an early production unit against the approved sample before the entire order proceeds too far. This helps identify problems while there is still time to correct them.

Before shipment, confirm the final inspection procedure and the quality acceptance criteria agreed upon in the purchase order.

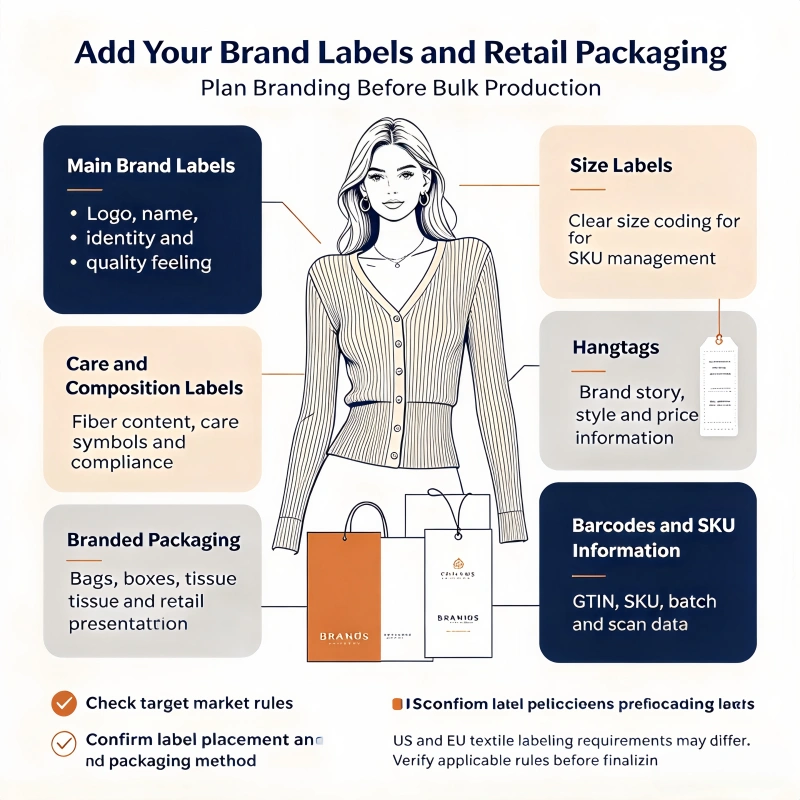
9. Add Your Brand Labels and Retail Packaging

For private-label buyers, plan branding before bulk production, not as an afterthought.

Depending on your requirements, customization may include:

  • Main brand labels
  • Size labels
  • Care and composition labels
  • Hangtags
  • Branded packaging
  • Barcodes and SKU information

Check that the fiber composition and care instructions are accurate and comply with the applicable labeling rules in your target market.

For example, US and EU textile labeling requirements differ in several respects. Buyers should confirm the rules that apply to their products and destination markets before finalizing labels.

Also review the label placement and packaging method on the approved sample. Small details can affect the finished product’s presentation and retail readiness.

10. How to Work With Qingdao Chengyuan Garment Co., Ltd.

At Qingdao Chengyuan Garment Co., Ltd., we provide garment development and manufacturing services for overseas B2B buyers.

Our process brings together design, pattern making, sample development and bulk production. We can work from technical packs, sketches or reference garments to develop women’s knit tops according to the buyer’s requirements.

Our monthly production capacity is approximately 80,000–120,000 finished garments across our production operations. This capacity supports a range of garment categories; actual availability for a specific knit top order depends on the product, quantity and production schedule.

For a more efficient quotation, buyers should prepare as much of the following information as possible:

  1. Product photographs, sketches or a reference sample
  2. Preferred yarn or material
  3. Target colors and size range
  4. Estimated quantity per style and color
  5. Branding and packaging requirements
  6. Target factory price
  7. Required delivery date and destination

If some technical details are still undecided, tell us what you already know and where you need recommendations. A clear discussion at the beginning can help identify practical options before sampling and bulk production.

Chengyuan Garment factory from Qingdao China

Frequently Asked Questions

How long does it take to make custom women’s knit tops?

The timeline depends on yarn availability, design complexity, sample revisions, order quantity and production scheduling. Ask the manufacturer for separate estimates for sample development, sample approval, bulk production and shipping.

Can I make custom knit tops from a picture?

Yes, a photograph can be a useful starting point. However, you should provide measurements, material preferences, construction details and notes explaining which features must be reproduced. A reference sample or detailed tech pack usually gives the manufacturer more information.

What information should I send for a quotation?

At minimum, provide the product type, reference image, estimated quantity, target material, size range, branding requirements and expected delivery date. A complete tech pack will help the manufacturer prepare a more accurate quotation.

What is the difference between a knit top and a knitted sweater?

The terms can overlap. In general, knit tops often refer to lighter garments such as ribbed tops, knitted T-shirts and short-sleeve styles, while sweaters commonly refer to warmer or heavier knitwear. The precise product category depends on the garment’s construction and intended use.

Can I order a small quantity before placing a bulk order?

Many manufacturers can support trial orders, but MOQ varies by style, yarn, color and production method. Confirm the minimum quantity and whether a later bulk order can reuse the approved specifications.

How can I reduce quality problems in bulk production?

Provide clear specifications, approve the correct sample, define measurement tolerances, test washing performance where necessary, and agree on inspection criteria before production. Retaining an approved reference sample is particularly useful for repeat orders.

Final Thoughts

Making custom women’s knit tops is a step-by-step process, but the most important decisions happen before bulk production begins.

Define the product, prepare a clear tech pack, select the yarn and knit structure, confirm measurements, review samples, test washing performance, agree on pricing and MOQ, and establish quality standards before approving the order.

For buyers, the biggest lesson is simple: do not rush sample approval just to save a few days. A careful review of fit, material and finishing can prevent much more expensive problems during bulk manufacturing.

If you are planning a women’s knit top collection, Qingdao Chengyuan Garment can help you move from an initial concept or reference sample toward a finished garment, with production arrangements confirmed according to your specific requirements.

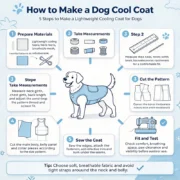
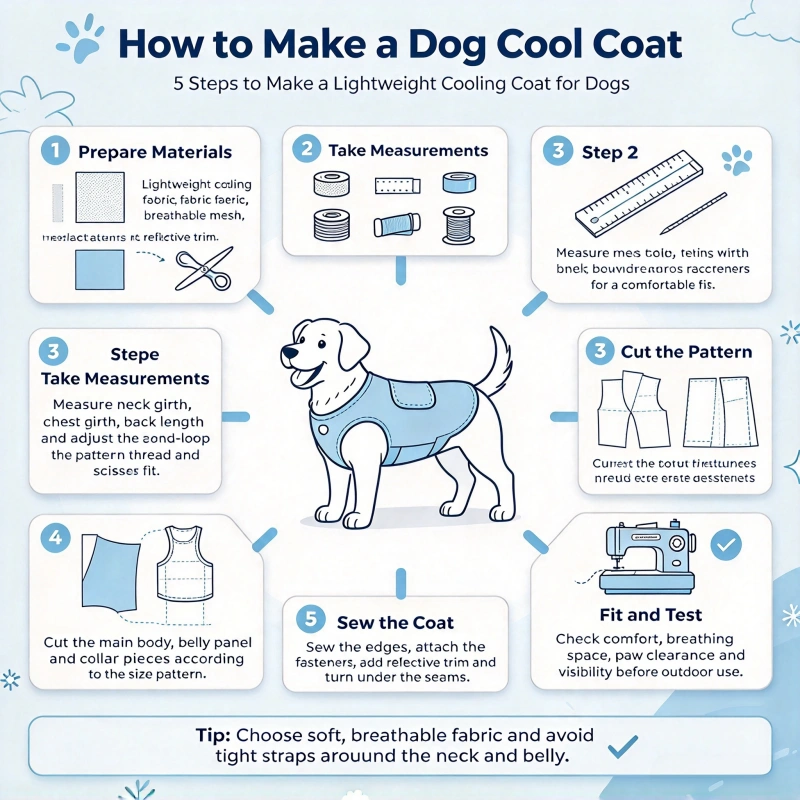
How to Make a Dog Cool Coat: A Practical DIY Guide

When summer arrives, keeping your dog comfortable becomes a daily challenge. Maybe your dog starts panting after a short walk, refuses to move away from the shade, or spends the afternoon lying on the coolest floor in the house. If you enjoy sewing or making things at home, learning how to make a dog cool coat can be a practical way to help your dog stay more comfortable in warm weather.

The good news is that you don’t need professional sewing skills or expensive equipment. With a few basic materials, some careful measuring, and the right design, you can make a simple cooling coat at home.

However, one important point comes first: a homemade cooling coat is an optional comfort aid, not protection against heatstroke. Dogs primarily regulate their body temperature through panting, and cooling garments cannot make dangerous heat or strenuous exercise safe. Cornell University College of Veterinary Medicine provides additional guidance on keeping dogs safe during hot weather.

1. Choose the Right Materials

Before cutting any fabric, decide how you want the coat to work. A simple DIY cooling coat can use absorbent fabric that holds water and allows it to evaporate gradually.

Here is what you will need:

MaterialSuggested OptionPurpose
Outer fabricLightweight, breathable cotton or meshProvides coverage and airflow
Absorbent layerThin cotton terry cloth or another washable absorbent textileHolds water for evaporative cooling
FastenersSew-on hook-and-loop tapeMakes the coat adjustable
ThreadStrong, washable sewing threadSecures the seams
Measuring tapeFlexible fabric measuring tapeHelps achieve a comfortable fit
Sewing toolsFabric scissors, pins and a sewing machine or needleCutting and assembly

You can often reuse a clean cotton T-shirt or lightweight towel for your first prototype.

I recommend starting with thin, washable materials rather than making the coat thick and heavy. A garment that absorbs a lot of water can become uncomfortable when wet, especially for a small dog.

Avoid waterproof outer layers that prevent evaporation, and do not add loose gel packs, chemical cooling agents or small removable parts that your dog could chew or swallow.

2. Measure Your Dog Before Making the Pattern

A cooling coat should fit comfortably without squeezing the chest, restricting shoulder movement or interfering with normal panting.

Take three basic measurements:

  • Neck circumference: Measure around the base of the neck where the coat will sit.
  • Chest girth: Measure around the widest part of the chest, usually just behind the front legs.
  • Back length: Measure from the base of the neck to the base of the tail.

For example, imagine a medium-sized dog with these measurements:

MeasurementIllustrative Example
Neck circumference16 in (40.6 cm)
Chest girth24 in (61 cm)
Back length18 in (45.7 cm)

These are sample measurements, not a standard size for every medium-sized dog.

Make a paper pattern first and test it against your dog’s body. Leave enough room for comfortable movement, but don’t make the coat so loose that it slips, twists or catches on objects.

A useful fitting test: Before sewing the final seams, check that your dog can walk, turn, sit and lie down normally while wearing the pattern.

3. Cut a Simple Dog Cooling Coat Pattern

For beginners, a wrap-style vest is easier to make than a complicated jacket with sleeves.

Start with two main sections:

  1. A body panel that rests over the back.
  2. Adjustable side panels that wrap around the chest and secure underneath or along the side.

The body panel should cover part of the dog’s torso without extending over the tail or interfering with the hind legs.

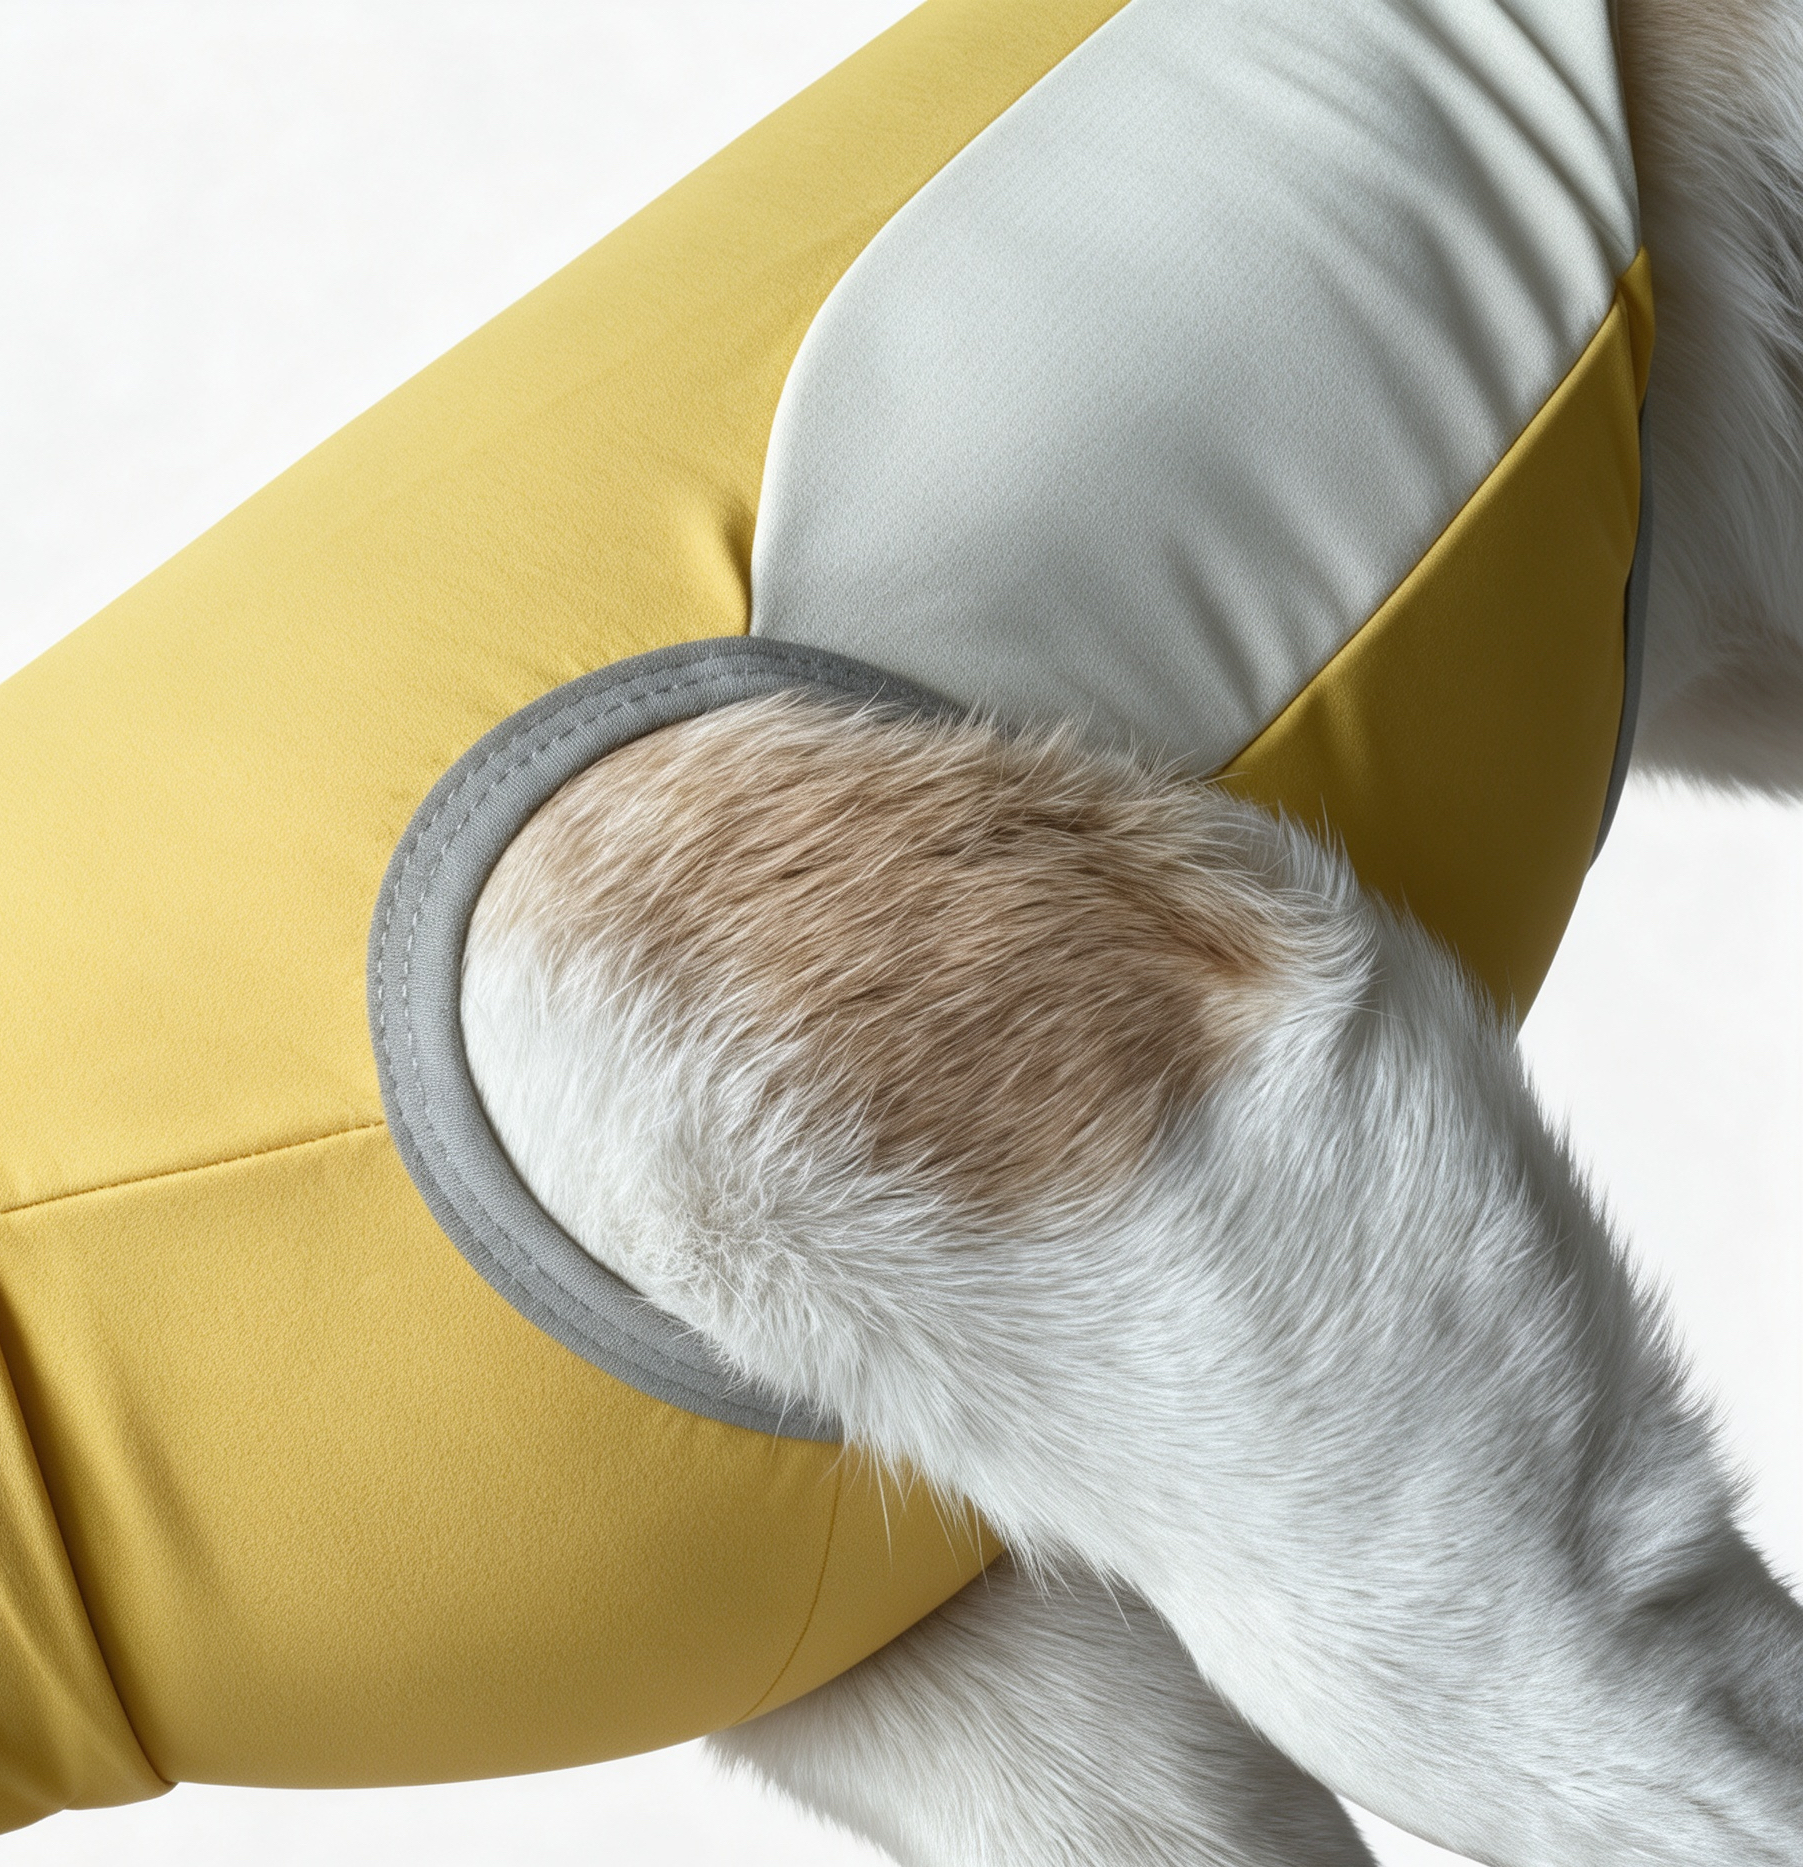
Round the corners and shape the front opening around the neck. Keep the arm openings generous enough to prevent rubbing behind the front legs.

For a first project, avoid sleeves, thick padding, decorative cords and complicated pockets. Every extra feature creates another possible source of friction or discomfort.

4. Sew the Cooling Coat Step by Step

Once the pattern fits, you can start sewing.

Step 1: Cut the fabric.

Cut the outer fabric and absorbent layer according to your paper pattern. Allow approximately 0.4–0.6 in (1–1.5 cm) for seam allowances if these are not already included.

Step 2: Join the layers.

Place the fabric pieces together and pin them around the edges. Sew around the perimeter, leaving a small opening to turn the coat right-side out.

Step 3: Finish the seams.

Turn the coat through the opening, smooth the edges and close the opening with a neat seam. Add a few lines of stitching across the body panel if needed to stop the layers from shifting.

Step 4: Attach the fasteners.

Sew hook-and-loop tape securely to the side panels. Position the fasteners so that the coat can be adjusted without putting pressure on the throat or ribcage.

Step 5: Inspect the finished garment.

Check every seam, fastener and edge. Remove loose threads and make sure there are no sharp parts or loose components your dog could chew.

Wash the coat before its first use to remove any manufacturing residue or loose fibers.

5. How to Use the Homemade Cooling Coat

A simple evaporative cooling coat works by holding water in the fabric. As that water evaporates, it can carry heat away from the garment and help support the dog’s cooling process.

Here is a practical routine:

  1. Wet the coat with clean, cool tap water.
  2. Gently squeeze out excess water so it is damp rather than heavily dripping.
  3. Put it on your dog and check the fit.
  4. Stay with your dog and observe its breathing, movement and comfort.
  5. Remove the coat if it becomes uncomfortable, restricts movement or starts to cause rubbing.
  6. Re-wet it only when appropriate for the fabric and conditions, and according to how the garment is performing.

Evaporative cooling works less effectively when humidity is high because water evaporates more slowly. Preventive Vet’s hot-weather guide explains both the potential benefits and limitations of cooling vests.

Never assume the coat is still helping simply because it is on your dog. If the fabric dries out, becomes warm or starts trapping heat, remove it and move your dog to a cooler environment.

6. A Practical Example: Improving a DIY Cooling Coat

Imagine a dog owner makes a coat from two layers of thick cotton towel. The garment holds plenty of water, but after being soaked it feels heavy, sags around the chest and rubs against the dog’s front legs.

The first instinct might be to add more straps or sew the coat more tightly.

A better solution is to simplify the design.

The owner could replace the thick inner layer with a thinner absorbent textile, reduce unnecessary fabric around the belly, and reposition the fasteners to distribute the weight more evenly.

The next test should focus on three things:

  • Does the coat remain secure when the dog walks?
  • Can the dog move its shoulders and breathe comfortably?
  • Does the garment stay damp without becoming excessively heavy?

This is an illustrative design example, not a verified veterinary case. The lesson is practical: more absorbent fabric does not automatically mean a better cooling coat. Weight, airflow and fit matter just as much.

7. Common Mistakes to Avoid

Making the Coat Too Thick

Multiple thick layers may retain water and add weight while reducing airflow. Start with a lightweight design and assess comfort before adding material.

Making It Too Tight

A coat that compresses the chest or rubs the armpits can cause discomfort. Always check the fit again after the fabric becomes wet.

Using Ice-Cold Materials

You don’t need to freeze the coat or put ice directly against your dog’s skin. Cool water is a sensible starting point for an ordinary DIY garment.

Leaving the Dog Unsupervised

Dogs may chew, twist or become caught in clothing. Supervise your dog, particularly during the first few uses, and remove the coat if your dog shows signs of distress.

Relying on Clothing During Extreme Heat

Fresh water, shade, ventilation, rest and adjusting outdoor activity are more important than any garment. Never leave a dog in a parked car, even if it is wearing a cooling coat.

8. How to Know When Your Dog Needs More Than a Cooling Coat

Heavy panting, excessive drooling, weakness, vomiting, confusion, difficulty breathing or collapse can indicate heat-related illness.

If you suspect heatstroke, move your dog out of the heat, start cooling with cool water if it’s safe, and seek urgent veterinary care. Do not wait for a homemade coat to solve the problem.

Dogs with flat faces, older dogs, overweight dogs and those with heart or breathing conditions may need extra precautions in warm weather. Ask your veterinarian whether a cooling garment is appropriate for your dog.

Frequently Asked Questions

What fabric is best for a homemade dog cooling coat?

A lightweight, washable, breathable outer fabric combined with a thin absorbent layer is a reasonable starting point for a basic evaporative design. The best combination depends on how well it holds water, allows evaporation and fits your dog.

Can I make a dog cooling coat without a sewing machine?

Yes. You can hand-sew a simple wrap-style coat using a needle, strong thread and basic fabric. Make sure all seams and fasteners are secure before allowing your dog to wear it.

How long does a homemade cooling coat stay effective?

There is no reliable universal duration. It depends on the fabric, amount of water, airflow, humidity, temperature and activity level. Check the garment frequently rather than assuming it will remain effective for a fixed number of hours.

Can every dog wear a cooling coat?

No. Some dogs dislike clothing, and some may have medical or breathing issues that require extra care. Introduce the coat gradually, monitor your dog’s response and consult your veterinarian if you are unsure.

Final Thoughts

Learning how to make a dog cool coat is a manageable DIY project if you keep the design simple. Start with breathable materials, measure carefully, use secure adjustable fasteners and test the fit before taking your dog outdoors.

Most importantly, remember that a cooling coat is only one small part of summer care. A cool environment, fresh drinking water, shorter walks during hot weather and close observation are still essential.

Make the coat for comfort—not as a reason to stay outside longer than the weather safely allows.

As a professional manufacturer of pet apparel, we offer a highly practical recommendation: if you own a pet brand, partnering directly with a manufacturer allows you to add a “cool coat” production line at a very low cost. It all starts with contacting a factory—such as us.